EPS wall panels are widely used in residential, commercial, and industrial construction due to their insulation performance and fast installation. Understanding the correct EPS panel installation process helps improve wall strength, thermal efficiency, and long-term stability while reducing construction time and labor costs.
In this guide, we explain how to install EPS wall panels step by step, from surface preparation to finishing details. Whether for interior or exterior walls, proper installation ensures reliable performance, clean joints, and a durable wall system suitable for various building applications.
What are EPS Panels?
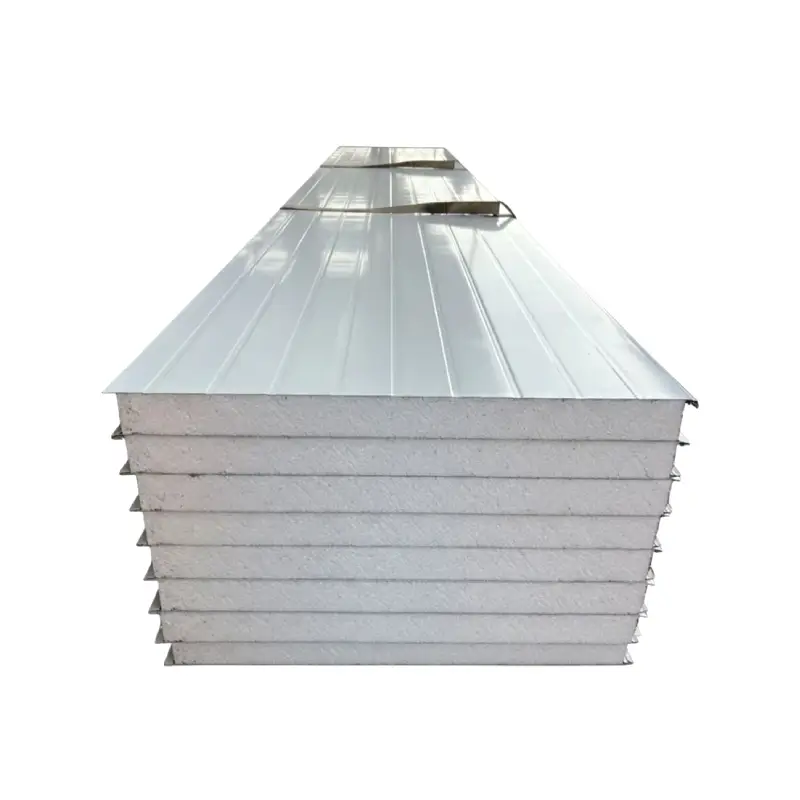
EPS panels are prefabricated building panels made with an expanded polystyrene core and protective surface layers. They provide thermal insulation, lightweight structure, and sound reduction.
Commonly used for walls, partitions, and roofs, EPS panels support fast installation, energy efficiency, and cost-effective construction in residential, commercial, and industrial buildings.
What are EPS Panels Used for?
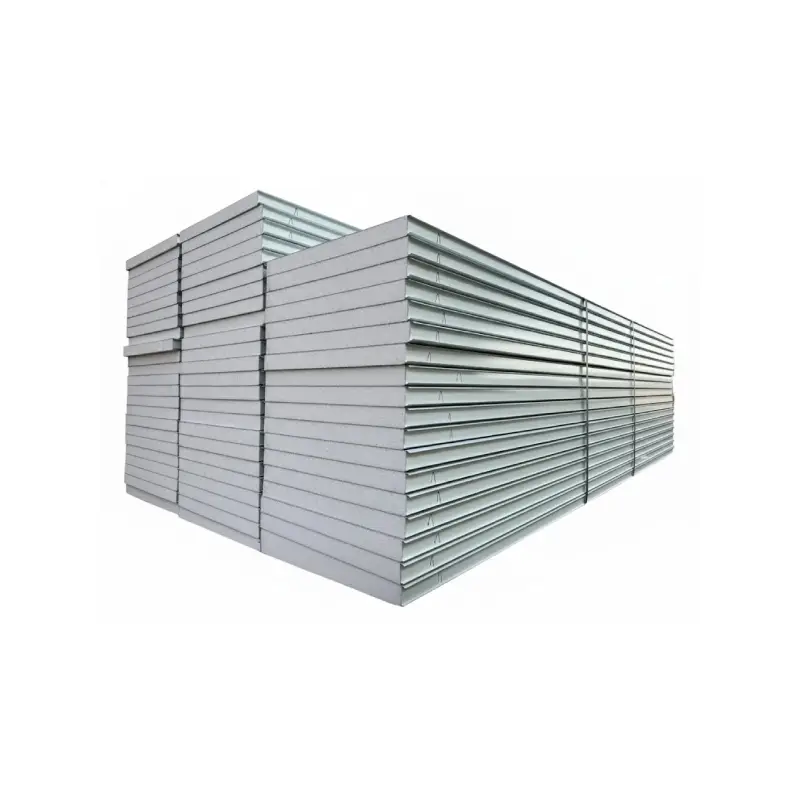
EPS panels are widely used in modern construction due to their insulation performance, lightweight structure, and fast installation. They suit many building types and applications where efficiency, cost control, and thermal stability are important requirements.
- Roof and floor insulation systems – EPS panels improve roof and floor insulation by reducing heat transfer, enhancing indoor comfort, and improving overall building energy efficiency.
- Exterior and interior wall systems – EPS panels are used for walls to provide thermal insulation, sound reduction, and structural support, helping maintain indoor comfort, reduce energy use, and speed up construction.
- Cold rooms and refrigerated spaces – EPS panels are applied in cold storage and coolrooms to maintain stable temperatures, reduce refrigeration load, and support energy-efficient operation.
- Partitions and space separation – EPS panels serve as internal partitions, allowing flexible layouts, quick installation, clean finishes, and effective sound insulation.
- Prefabricated and modular buildings – EPS panels are used in prefabricated construction to support factory production, fast on-site assembly, lower labor needs, and consistent building quality.
How to Install EPS Panels?
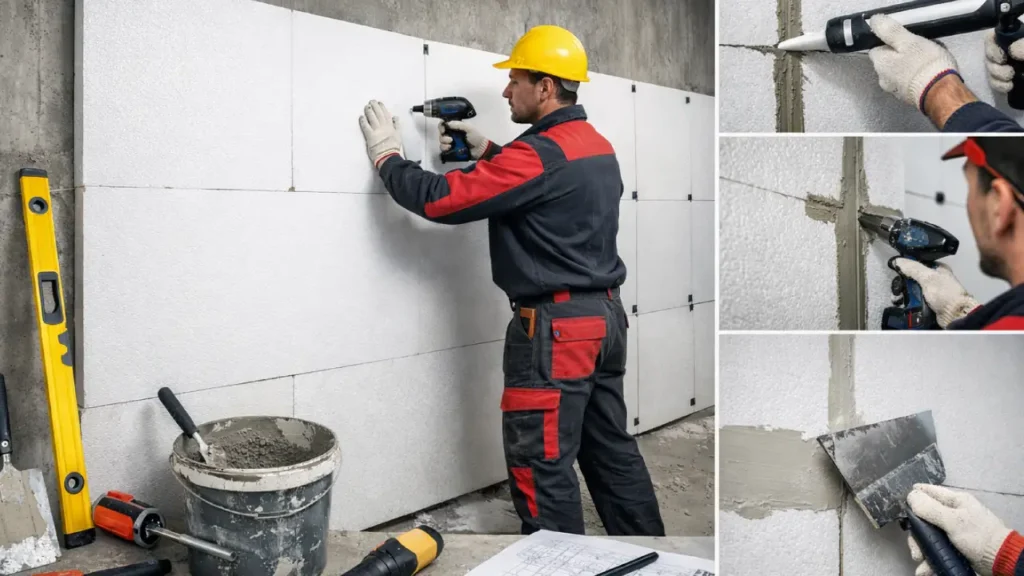
EPS panel installation ensures strong, insulated, and durable walls. Following proper procedures improves thermal performance, construction speed, and long-term reliability. From surface preparation to final inspection, each step contributes to airtightness, structural stability, and energy efficiency.
The steps below guide builders through a complete, practical EPS panel installation process.
Tools Needed
- Measuring tape
- Spirit level
- Electric drill
- Anchors and screws
- Adhesive or mortar
- Sealant
- Safety gloves
Step 1: Surface Preparation
Before installation, ensure floors, walls, and ceilings are clean, level, and free of debris. Remove dust, grease, or loose materials to provide a stable surface. Well-prepared surfaces help panels align correctly, improve bonding strength, and prevent gaps or uneven joints during installation.
Mark layout lines and reference points carefully using a chalk line or laser level. Check vertical and horizontal alignment before placing panels. Accurate preparation at this stage reduces rework, ensures consistent wall geometry, and supports the long-term structural stability and insulation performance of the EPS panel system.
Step 2: Panel Positioning
Start from corners or reference edges and place EPS panels according to marked lines. Use a spirit level to ensure vertical and horizontal alignment. Correct positioning ensures tight joints, smooth wall surfaces, and proper load distribution, which is critical for both aesthetics and long-term wall performance.
Check panel orientation and spacing between panels to maintain uniform gaps. Adjust panels slightly if needed to ensure straight lines and tight fits. Proper positioning minimizes installation errors, enhances wall appearance, and contributes to efficient workflow during large-scale or complex construction projects.
Step 3: Fixing Panels
Secure panels with appropriate anchors, screws, or adhesives depending on the substrate and project requirements. Strong fixing prevents movement, maintains alignment, and ensures panels stay in place under thermal expansion or building loads. Proper attachment supports insulation continuity and structural reliability.
Avoid over-tightening fasteners to prevent panel damage. Place fixing points evenly according to manufacturer guidelines. Correct fixing not only enhances wall durability but also maintains thermal efficiency by preventing gaps that could compromise the insulation properties of EPS panels.
Step 4: Joint Sealing
Seal all panel joints with compatible sealants, tapes, or foams to prevent air leakage and moisture ingress. Proper sealing ensures thermal continuity, improves energy efficiency, and protects against condensation and mold growth in insulated walls.
Inspect each joint to confirm complete coverage. Filling gaps carefully maintains panel alignment and strengthens the wall system. Well-executed joint sealing enhances indoor comfort, reduces energy costs, and ensures the EPS panel system performs reliably over time.
Step 5: Surface Finishing
Apply finishing materials such as plaster, paint, or coatings according to design requirements. Finishing protects panels from external wear, enhances aesthetics, and provides additional moisture resistance to the wall surface.
Ensure smooth, even application over panels and joints. Inspect finished surfaces for cracks, unevenness, or gaps. Proper finishing complements the insulation performance, improves durability, and provides a clean, professional look for interior or exterior wall applications.
Step 6: Final Inspection and Maintenance
Conduct a thorough inspection of panel alignment, joint sealing, and fixing points. Verify that panels are securely installed and that the wall meets construction and insulation standards.
Document any minor adjustments or maintenance needs. Regular inspections over time help maintain thermal efficiency and structural integrity. Following this step ensures long-lasting performance and maximizes the benefits of EPS wall panels in all building applications.
Tips for EPS Panel Installation

EPS panel installation requires attention to detail to ensure walls are strong, insulated, and durable. Following practical tips helps reduce errors, improve efficiency, and maintain thermal performance. These guidelines cover preparation, alignment, fixing, joint sealing, and finishing to achieve professional results for residential, commercial, and industrial projects.
Inspect and finish carefully – After installation, check all panels, joints, and fixing points. Apply finishing coatings as needed and make adjustments to ensure smooth surfaces, strong adhesion, and optimal insulation performance for long-term durability.
Measure and plan carefully – Before installation, accurately measure the wall area and plan panel layout. Proper planning reduces material waste, prevents misalignment, and ensures consistent panel placement, helping speed up installation and maintain wall geometry throughout the project.
Check surface quality – Ensure floors, walls, and ceilings are clean, level, and structurally sound. Smooth surfaces improve adhesion, reduce gaps, and prevent uneven joints, which supports long-term performance and reliability of EPS wall panels.
Use the right tools and materials – Select proper anchors, adhesives, screws, sealants, and measuring tools. Using suitable materials ensures panels are securely fixed, joints are airtight, and insulation performance is maintained while simplifying the installation process.
Maintain panel alignment – Continuously check vertical and horizontal alignment with a spirit level during installation. Consistent alignment prevents gaps, uneven surfaces, and structural stress, ensuring a uniform appearance and reliable wall performance over time.
Seal joints properly – Apply compatible sealants or tapes to all panel joints. Correct sealing prevents air leakage, moisture infiltration, and condensation, protecting the insulation layer, improving energy efficiency, and extending the lifespan of the wall system.
Conclusion
Proper EPS panel installation plays a key role in achieving strong, insulated, and long-lasting wall structures. By following correct procedures for positioning, fixing, and joint sealing, builders can improve energy efficiency, reduce maintenance issues, and ensure stable performance across different environments and building types.
Careful installation also helps maximize the benefits of EPS wall panels, including lightweight handling, fast construction, and consistent wall quality. Paying attention to details during each step minimizes errors, shortens project timelines, and supports smoother project delivery for both small and large-scale developments.
For reliable supply and consistent specifications, you can get wholesale EPS wall panels from our Epsole. We provide stable production, flexible customization, and dependable delivery, helping contractors and developers complete projects efficiently with panels designed to meet practical construction and insulation needs.