Hot wire foam cutters are indispensable tools for achieving precise, clean cuts in various foam types, from crafting to insulation. Unlike traditional blades, they melt rather than tear the foam, creating smooth edges with minimal debris.
Mastering the art of hot wire foam cutting requires understanding the best practices to ensure optimal results. This guide will delve into techniques and tips to help you achieve perfectly clean edges on all your foam projects, enhancing both aesthetics and functionality.
What is Hot Wire Foam Cutting?
For those new to hot wire cutting, fear not! It’s a relatively simple process that crafters of all experience levels can enjoy.
There are two main options to get started:
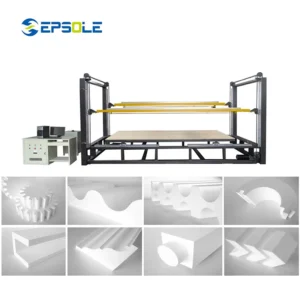
- Purchasing a Hot Wire Cutter: This is the easiest approach. Pre-made hot wire cutters are readily available at craft stores and online retailers. They come in various styles, from basic handheld units to more advanced models with adjustable temperatures and cutting angles.
- Building Your Own Hot Wire Cutter: For the DIY enthusiasts, building your own hot wire cutter is a fun and rewarding project. You’ll typically need nichrome wire, a power supply (with adjustable voltage for temperature control is ideal), and a material to hold and guide the wire (wood is a common choice). Safety is paramount, so ensure all electrical connections are secure and use a heat-resistant handle.
Now that you have your hot wire, let’s explore what kind of foam you can use!
- XPS Foam: This rigid, blue or pink foam is commonly used for insulation and building projects. It’s great for architectural models and larger creations.
- Upholstery Foam: Perfect for creating cushions, props, or cosplay armor.
- Polyurethane Foam: This versatile foam comes in various densities and is great for packaging inserts, craft projects, and model making.
- Polyethylene Foam: Often used for packaging materials and soundproofing, it can be cut with a hot wire for specific applications.
Beyond the Basics: Creative Applications of Hot Wire Foam Cutting
Hot wire cutting opens a door to endless creative possibilities. Here are just a few ideas to spark your imagination:
- Foam Gun Case: Design and cut a custom foam insert to perfectly cradle your firearm and accessories for safe storage and transport.
- Foam Wings for Cosplay or Model Airplanes: Craft lightweight and detailed wings for your next costume or model project.
- Foam Rubber Stamps: Create custom shapes from foam rubber for unique and personalized stamped designs.
- Foam Board Sculptures: Construct impressive 3D sculptures or signs using layered foam board cut into desired shapes.
- EVA Foam: Absolutely! EVA foam is popular for cosplay costumes and crafting projects due to its soft and flexible properties.
Foam Cutting Hot Wire Benefits
Foam cutting with a hot wire offers precision, efficiency, and smooth edges for a variety of projects. Understanding its benefits can help you achieve professional results while saving time and reducing material waste.
Here are the key advantages of using a hot wire for foam cutting:
- Versatility across foam types – Hot wire tools can handle a range of foam densities, from soft craft foam to rigid insulation panels. This adaptability makes it suitable for hobbyists, model makers, and professionals needing consistent, clean results across different materials.
- Clean and precise cuts – A hot wire melts through foam effortlessly, producing smooth, accurate edges without tearing or rough surfaces. This precision is ideal for detailed models, signage, or craft projects, ensuring a professional finish every time.
- Reduced material waste – Hot wire cutting minimizes foam wastage because it slices cleanly along the intended lines. Unlike mechanical cutting, which can create uneven edges or fragments, this method ensures you get the most out of your materials while keeping workspaces tidy.
- Time efficiency – Using a hot wire speeds up the cutting process significantly. It allows for continuous, controlled slicing, reducing the need for sanding or reshaping afterward, making large-scale or repetitive projects faster and more manageable.
How to Cut Foam With a Hot Wire?
Cutting foam with a hot wire transforms a challenging task into a smooth, precise operation. This method leverages heat to melt through the material, yielding clean edges far superior to those achieved with traditional blades.
Mastering this technique involves several crucial steps, from proper setup to the actual cutting motion, ensuring safety and optimal results. Follow this guide for best practices in achieving professional-quality foam cuts.
Step 1. Prepare Your Workstation
Before you begin cutting, ensure your workspace is well-ventilated, as melting foam can release fumes. Lay down a protective surface, like a scrap piece of wood or cardboard, to shield your table from accidental contact with the hot wire. This prevents damage and provides a stable base for your foam.
Additionally, gather all necessary tools, including your hot wire cutter, ruler, and any templates you plan to use. Having everything within reach will streamline your cutting process and minimize interruptions, contributing to smoother, more consistent cuts.
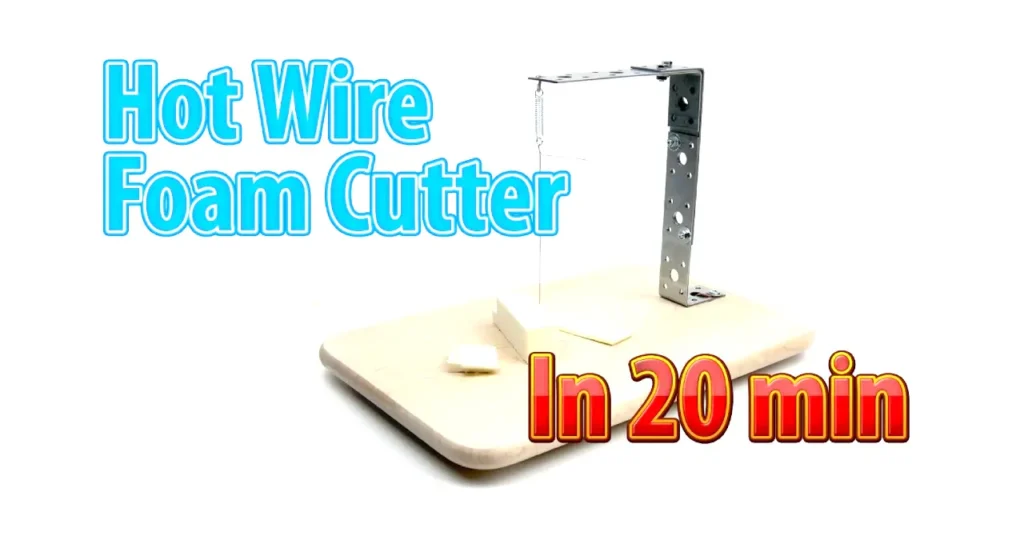
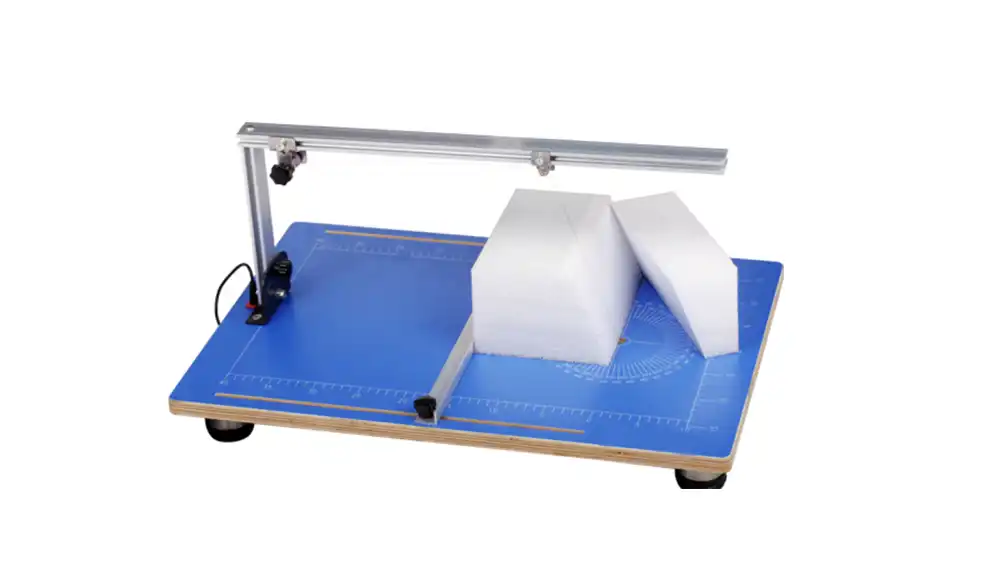
Step 2. Set Up the Hot Wire Cutter

-300x300.webp)
Properly assembling your hot wire cutter is critical for safety and performance. Ensure the hot wire is securely attached to the cutting tool’s arms or frame, following the manufacturer’s instructions carefully. A taut, well-tensioned wire is essential for straight and precise cuts.
Next, plug in your hot wire cutter and allow it sufficient time to heat up. The ideal temperature will vary depending on the foam density and type, so some initial testing on a scrap piece is often beneficial to find the perfect heat setting.
Step 3. Mark Your Cutting Lines
Accurate marking is paramount for precise foam cutting. Use a ruler and a fine-tipped marker or pencil to clearly draw your desired cutting lines directly onto the foam surface. For complex shapes, consider creating templates from paper or thin cardboard.
Ensure your marks are visible but not so deep they deform the foam. Precise lines act as your guide, helping you maintain a steady hand and consistent path as you move the hot wire through the material, leading to cleaner edges.
Step 4. Perform the Cut
With your foam marked and the wire heated, begin the cut. Slowly and steadily guide the hot wire along your marked line, applying gentle, consistent pressure. Allow the heat to melt through the foam; avoid forcing the wire, as this can lead to uneven cuts or breakage.
Maintain a consistent speed throughout the cut. Moving too fast will result in a jagged edge, while moving too slowly can create an overly wide kerf or burn marks. Practice on scrap pieces to find the optimal speed for your specific foam type and wire temperature.
Step 5. Finish and Clean Up
Once the cut is complete, carefully separate the foam pieces. Unplug your hot wire cutter and allow it to cool down completely before storing it. Proper cooling prevents accidental burns and extends the life of the tool.
Finally, clean your workstation. Dispose of any foam scraps responsibly. Ensure all tools are put away safely. A tidy workspace is crucial for safety and prepares you for your next project, maintaining efficiency and organization.
How to Make a Hot Wire for Cutting Foam?
Hot wire foam cutting is a precise method used to shape foam materials by passing a heated wire through them. The wire melts the foam along a controlled path, producing smooth, accurate edges. It is widely used in model making, packaging design, architecture prototypes, and insulation shaping due to its clean results.
By assembling a simple frame, wire, and power source, you can create a reliable cutting tool that produces smooth edges and controlled cutting performance. It is widely used in foam fabrication and prototyping work.
Tools Needed
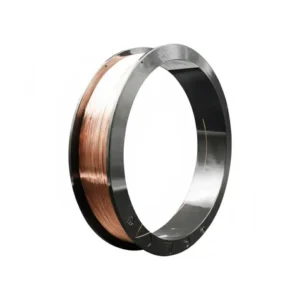
- Nichrome wire
- Wooden or metal frame materials
- Low-voltage power supply or transformer
- Screws, clamps, or binding posts
- Wire cutters and screwdrivers
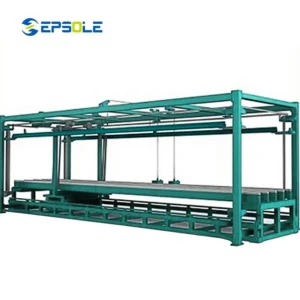
Step 1: Build Frame
Start by building a stable frame using wood, metal, or sturdy plastic to support the hot wire system. The frame should be strong enough to stay steady during cutting and large enough to handle your foam size. Ensure the structure is square and well aligned for accurate cutting performance results
Reinforce key joints of the frame to prevent movement when the wire heats up and tension is applied. Use screws or glue depending on material type. Add support arms or anchor points where the wire will attach ensuring they can handle heat tension and repeated cutting use safely and reliably
Step 2: Install Wire
Install a resistance wire such as nichrome wire across the frame, securing both ends tightly to the anchor points. The wire should be straight and evenly tensioned to ensure smooth cutting. Avoid slack or uneven alignment as it can affect accuracy and cause inconsistent foam cutting results during use operation
Connect the wire securely using screws, clamps, or binding posts depending on your frame design. Ensure electrical contact is firm and stable to prevent overheating at weak points. Check alignment again after installation to confirm the wire remains centered and properly tensioned across the entire cutting area for precision cutting
Step 3: Connect Power and Control
Attach the wire ends to a low-voltage power source such as a transformer or adjustable power supply. This allows controlled heating of the wire for safe foam cutting. Always start with low voltage and gradually increase until the wire reaches the right temperature for smooth melting performance and stability output
Use a variable power controller or dimmer switch to regulate heat levels during cutting. This helps maintain consistent wire temperature for different foam densities. Proper control prevents burning improves edge quality and extends wire life by avoiding overheating during long or complex cutting operations ensuring safe reliable consistent performance results
Cutting Polyurethane Foam With Hot Wire
Cutting polyurethane foam with a hot wire cutter is strongly discouraged for several reasons:
- Toxic Fumes: Polyurethane foam, when heated, releases harmful fumes that can irritate your lungs and eyes. These fumes can be particularly dangerous in poorly ventilated areas.
- Messy Cutting: Hot wire cutting on polyurethane foam tends to be messy. The heat can melt the foam unevenly, leaving behind a rough and uneven cut surface.
- Ineffective Cutting: Polyurethane foam can be denser and more difficult to cut cleanly with a hot wire compared to other foams like polystyrene (Styrofoam) or XPS foam.
Safer Alternatives for Cutting Polyurethane Foam:
Here are some safer and more effective methods for cutting polyurethane foam:
- Sharp Blades: Using a sharp utility knife, craft knife, or bread knife can provide clean and precise cuts on polyurethane foam. Opt for a serrated blade for thicker foams.
- Electric Cutting Tools: Electric carving knives or hot knives specifically designed for foam cutting can offer better control and cleaner cuts compared to a standard hot wire cutter.
- Die Cutters: For repetitive cuts on polyurethane foam sheets, consider using a die-cutting machine. This allows for consistent and precise shapes.
Important Note: Always ensure proper ventilation when cutting polyurethane foam, regardless of the method used. Consider wearing a dust mask for additional protection from airborne particles.
Here’s a quick comparison table to summarize the differences between polyurethane foam and other types of foams:
| Method | Polyurethane Foam | Other Foams (XPS, Styrofoam) |
|---|---|---|
| Hot Wire Cutting | Not Recommended (Toxic fumes, messy cuts) | Works well, clean cuts |
| Sharp Blades | Effective, clean cuts | Effective, clean cuts |
| Electric Cutting Tools | Effective, cleaner cuts than hot wire | Very effective, clean cuts |
| Die Cutters | Effective for repetitive shapes | Not ideal |
Can You Cut EVA Foam With a Hot Wire?
Yes, EVA foam can be cut with a hot wire, but it’s not always the best option. Hot wire cutting works more cleanly on polystyrene-type foams, while EVA tends to melt unevenly and can produce rough edges or fumes. For EVA foam, a sharp blade, heated knife, or CNC cutter usually gives more controlled, accurate, and cleaner shaping results overall.
Can You Cut Polyurethane Foam With a Hot Wire?
Polyurethane foam can be cut with a hot wire, but it is generally not recommended. Unlike polystyrene foams, polyurethane does not melt cleanly and may burn or release unpleasant fumes when exposed to high heat. For better control and safety, sharp knives or electric hot knives are preferred for shaping this material. This helps achieve smoother edges and reduces harmful smoke during cutting tasks in workshops in most workshop cases.
Conclusion
By consistently applying the best practices for hot wire foam cutting – from proper ventilation and wire tension to controlled speed and temperature – you can achieve professional-grade results. These techniques ensure clean, smooth edges, enhancing the quality of your projects and minimizing waste.
Remember that practice makes perfect. Experiment with different foam types and densities to truly master the nuances of your hot wire cutter. Your precision will improve with every cut, opening up new creative possibilities.
For your large-scale foam needs, consider sources like Epsole for wholesale EPS foam. Utilizing premium foam materials combined with these cutting best practices will elevate your foam projects to the next level.